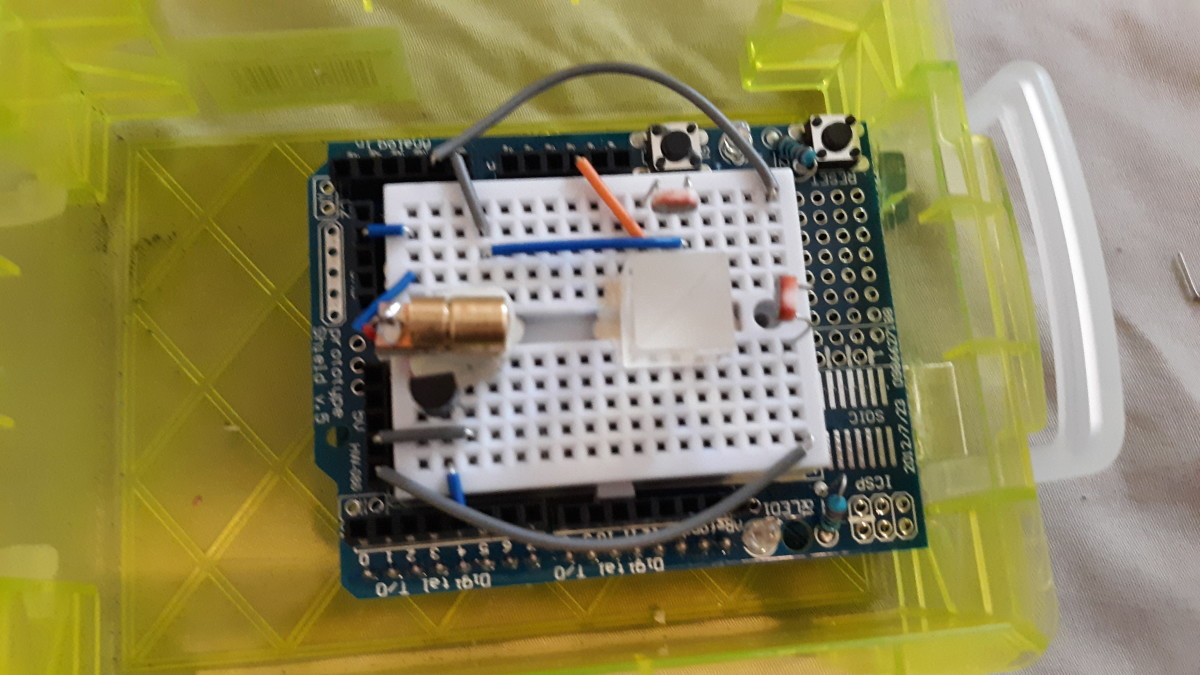
In 2000 scientists Knill, Laflamme, and Milburn developed a method of performing quantum computations that later became known as the KLM Protocol. Essentially, what they found was that you could perform any theoretical quantum computation using nothing more than cleverly arranged optics! (mirrors) Using the quantum properties of light and the KLM protocol, we are able to create qubits quickly and affordably using off-the-shelf optics and electronics components, beam splitters (partial mirrors) can be purchased for as little as $30 making the KLM protocol the cheapest method of achieving quantum computing to date. It’s this affordability that has allowed me to experiment with simple quantum circuits in my living room!
Quantum Randomness
Quantum systems appear to be naturally random to us, the actions of sub-atomic particles are determined by the probability of that action occurring upon observation, so quantum technology is well-suited for randomness and entropy generation. Using the KLM protocol, we are able to create affordable quantum computers! Because of that, the first quantum circuit I built was a simple random number generator based loosely on the KLM Protocol. Using what’s known as a polarizing beam splitter we are able to create distinct optical paths or modes based on the polarization of a photon. The beam splitter will reflect horizontally polarized light and allow vertically polarized light to flow through unimpeded. This alone is not all that interesting, but light has another quirk known as superposition where a photon can act as both a particle, traveling through one or the other mode, or as a wave, traveling through both modes simultaneously! This effect was first known to be observed in an experiment by the Physician Thomas Young in his famed double-slit experiment. Here’s where it gets really weird though, when the photon passes through the beam splitter, if it isn’t perfectly horizontally or vertically polarized, it will actually be both reflected and passed through the beam splitter. It’s not until the photon is actually detected that it “collapses” out of this wave-like state and back into a particle randomly onto one of the two possible modes. Confused? Check out this video from Physicist Eugene Khutoryansky which explains it much better than I could hope to
Explanation of Quantum Mechanics
Measuring Light
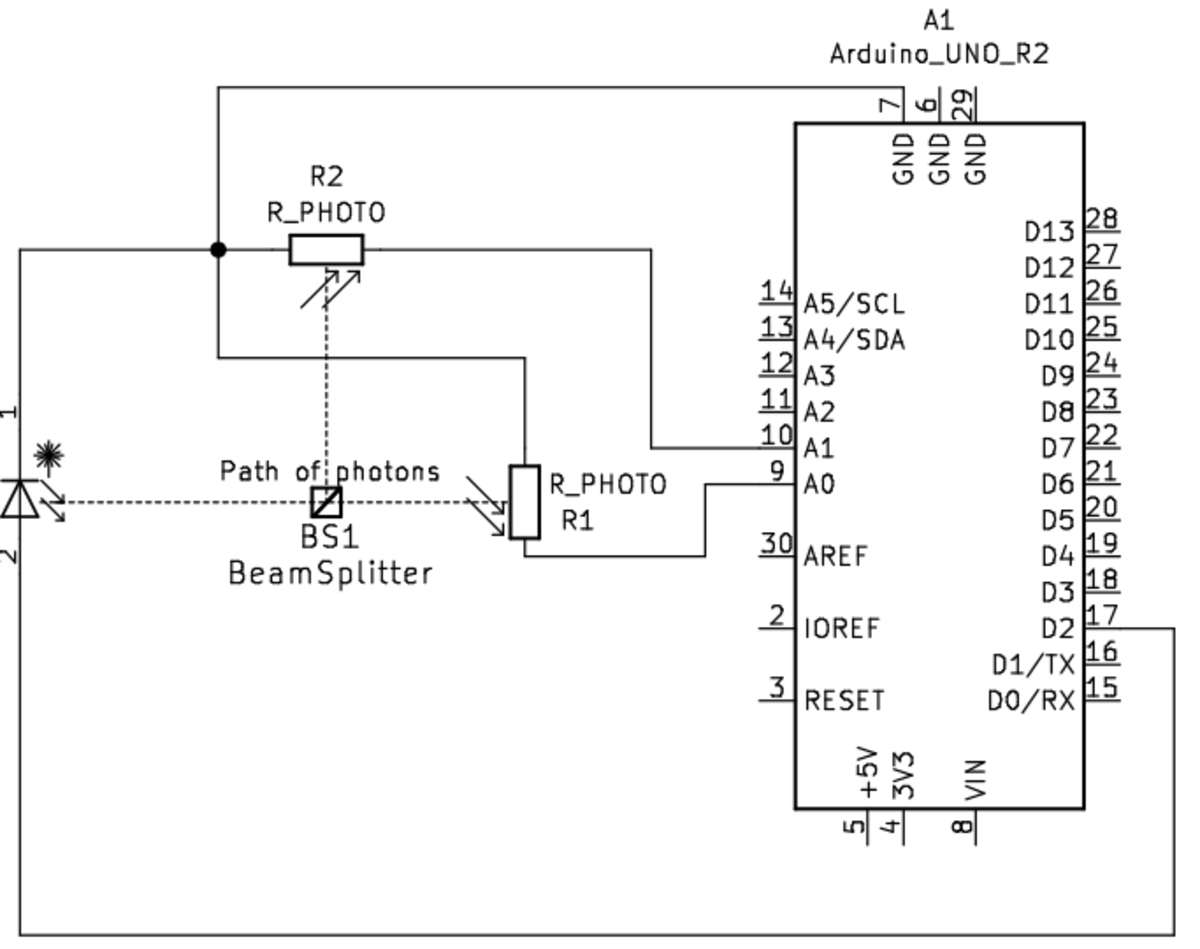
With the knowledge above, making the device isn’t an overly difficult task, we simply shine a light through a beam splitter and measure the light. But how do we measure the light? The answer is really simple, while there does exist some very high-tech (and expensive) ways to measure photons, the easiest way to measure light is using a component called a photoresistor. Photoresistors are variable resistors that allow us to change the resistance of a circuit based on how many photons come into contact with the photoresistor. When the photons hit the photoresistor it will lower the resistance of the circuit which will increase the voltage of our circuit. Photoresistors are as inexpensive as transistors and LEDs making this a very affordable option for the DIY quantum computer hobbyist.
A Word on Photon Modes
Our quantum computer will be using linearly polarized photons as the qubit. This gives us two possible states for our qubit: Horizontally polarized and Vertically polarized along with a superposition polarization which can be any angle between 0 and 90 degrees. A quick demonstration of the states is shown below in text form:
Vertically polarized light: | Horizontally polarized light: __ Light in a superposition of polarization: /
Designing the Quantum Circuit
When working with quantum computers, it all starts with the algorithm. You need to know what you want your quantum circuit to do before you can manipulate the particles to do what you want. For this first quantum circuit, the algorithm is really simple! And thus we are able to create our quantum random number generator!
Arduino Firmware
The Optical Circuit
Parts to Build It Yourself
If you want to build this for yourself, here are the parts that you need (these are the same materials I used):
Arduino Uno Photoresistors 50/50 Beam splitter 650nm Red Laser Diode Plastilina Clay Arduino Breadboard Shield Case/project box (I purchased mine at Michael’s, but my first prototypes just used the cardboard boxes the components were delivered in)
A note on beam splitter shipping: The beam splitters can take a little while to have shipped, I believe they come from China. I would recommend Edmunds optical if you wanted to take a serious go at quantum computing, but they can be quite pricey and we don’t really need that sort of lab-level quality for simple home experimentation—yet! Tips:
Use a small ball of plastilina clay to stick the beam splitter to the breadboard and to hold the laser diode in place. Use cotton gloves to prevent dirtying the optics. Cover the device when in use.
The Photon Problem
For this design, we are able to use a laser pulse that contains trillions of photons, by simply measuring both “modes” and comparing the voltage shift we can easily determine whether the collapsed qubit should produce a 1 or a 0, but for more advanced designs that involve quantum entanglement (where the real power in quantum computing is), we have to use what are known as single-photon sources. Unfortunately, reliably creating a single photon isn’t actually that easy; the same quantum randomness that promises us capabilities far surpassing that of digital computers also rules the creation of photons, and for that reason, there is no ideal single-photon source yet on the market for us to enjoy although there has been some promising research done with nano-diamonds that may yet clear the way for affordable commercial quantum computers. With that said, using laser attenuation it is conceivable for a hobbyist to create a fairly reliable (if not ideal) single-photon source to use for their own purposes, but this is not perfect and comes with its’ own set of challenges.
Creating Entangled States
Entanglement is an even bigger issue DIYer’s are going to face when building their own optical quantum circuits, after all, photons don’t interact with each other! How can they become entangled? But the same geniuses (seriously, geniuses) that created the KLM protocol also discovered a way to use simple optical components to entangle photons using non-linear sign-shift gates and, I know this sounds like science fiction: teleportation, neither of which will I pretend to completely grok. I would instead point you back towards the Wikipedia page on the KLM protocol if you would like to learn more about this. It is something I myself am working on in my own home shop but have not been able to achieve as of yet
Open Sourced Quantum Computing
My fascination with quantum computing that drove me to build my very own quantum computer has also driven me to start Spooky Manufacturing, an open-source quantum computing startup. We currently host a github with complete build instruction, schematics, and software for quantum computing hobbyists to freely enjoy (all licensed under the GPLv3 open-source license).I’d like to invite all of you to check out our other projects as well, we’ve got a few free tools in the works such as:
QEDA: optical circuit design automation software QController: testing software for quantum circuits
We hope these tools are going to make designing, building, and programming DIY quantum computers and circuits as easy and fun as the Arduino or Raspberry Pi. This article is accurate and true to the best of the author’s knowledge. Content is for informational or entertainment purposes only and does not substitute for personal counsel or professional advice in business, financial, legal, or technical matters. © 2019 Noah G Wood
Comments
Noah G Wood (author) from United States of America on October 29, 2020: It appears true to me, but if there’s any issues you can find I’d love to hear about them :) ali on July 10, 2020: this circuit is not true

